
Click HERE to see the video.
Enjoy!

.jpg)
.jpg)
.jpg)

 |
| DIY Headband by recycling an old shirt. |
 |
| Find an old shirt. |
 |
| I measured 12 inches from the bottom hem. |
 |
| Mark your cut line. |


 |
| Cut along your line |
 |
| Nice straight cut complete. |
 |
| Now cut the "tube" of fabric to make a rectangle. |
 |
| Trim the edges to square up your piece of fabric. |


 |
| Fold in half the long way. |
 |
| And again... |
 |
| One more time. |
 |
| This is about 1 3/8 (35mm) wide. |
 |
| Pin for sewing. |
 |
| Now we have our sewable piece. |
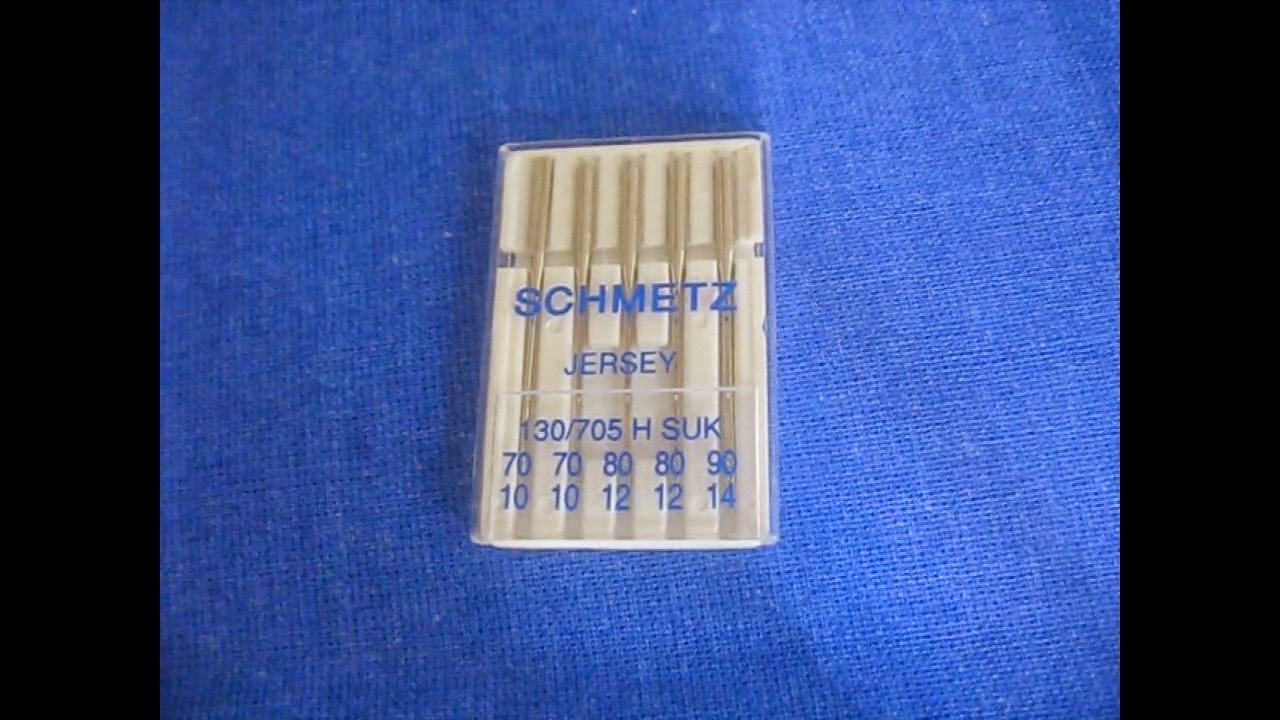 |
| Use a sharp needle. |
 |
| If you have a walking foot it helps with thick material. |
 |
| Check your stitches. |
 |
| Cut the ends so you can bind them with a zigzag stitch. |


 |
| Bind using a zigzag stitch. |


 |
| Fold over each side. Kind of like a knot, but so that both ends attach on the same side. |


 |
| Pin at the desired length. |
 |
| Use a back and forth stitch at the corners to attach on each side of the pin. |


 |
| You can now decorate or embellish however you like. |
|
If you want to see this in video format click HERE.If you have comments please leave them below.Thank you for visiting my blog! |
